HOW TO: Create Animated Characters
- Michael Pettyt
- Oct 3, 2022
- 6 min read

Updated: Oct 4, 2022

Introducing our animation team
With over 13 years of combined experience in illustration, design and animation, Greg and Jake are our go-to duo for character illustration and animation here at the studio. Welcome to their blog debut where they cover how they create characters and bring them to life for our clients.


Greg and Jake at work in the studio
In recent years we've created a wealth of content focused on character animation that has helped us to fine-tune a truly collaborative creative process.
Our team uses a variety of software packages. Here we'll be covering how we use Adobe Illustrator, After effects & DUIK (which is our go-to rigging tool).
Creating our Character - Illustration
A timelapse of the character illustration process.
Every character we animate starts out life as an illustration.
The process begins by drawing our Jake character. It's important to keep in mind how the character is going to move: Will they be walking? Will they be required to jump?
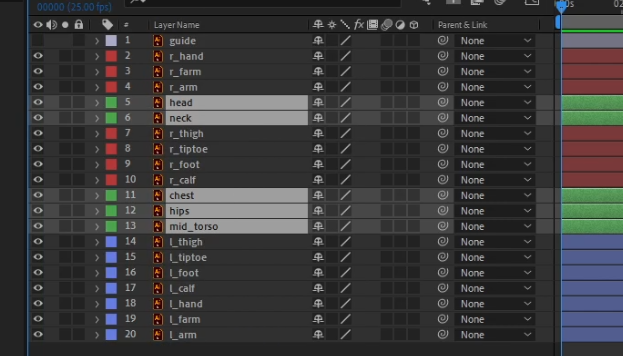
Once the initial illustration of Jake is completed, it's time to divide the artwork into layers. This is an important step as the layer information and hierarchy will carry through when importing our character into After Effects.

Now that everything has been named and ordered correctly, it's time to think about importing it into After Effects. It is worth mentioning that this is a very simple rig which only encompasses the main "skeleton" of the character. You can increase the complexity by moving the eyes, mouth, hair etc onto separate layers if you want to animate them too.
If you would like to have a go at illustrating a character and preparing it for rigging inside After Effects using DUIK we've provided a template to download at the end of this post.
Importing our Character
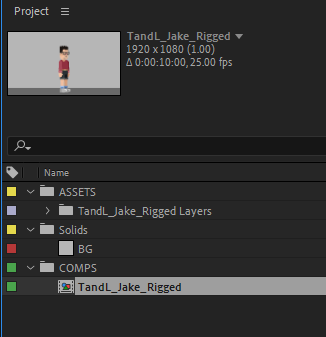
Now that Jake has been illustrated and prepared, it's time to move on to setting up After Effects for character animation and importing him into his new home.
A good After Effects workspace for this process is one which gives you as much vertical space for layers as possible. Just this one character is going to require many layers because of how each body part is separated.

When we Import the completed illustration we always choose 'Composition - retain layer sizes' from the drop-down menu as this will bring the artwork in as a composition, mirroring how the artwork has been layered in Illustrator while keeping everything at the correct size with the bounding box.

At this point, it's a good idea to check that all the layers are named corrected and are in the correct order. Next, you should use the colour coding of the layers and use folders to ensure everything is organised. This is especially helpful when you may need to swap out assets or link new artwork to the rig later on.


Rigging up
Now everything is looking neat and tidy in After Effects, it's time to "get rigging" and give Jake some bones. In Duik you can create a multitude of different structures and bones. For this rig, we can use a preset structure called a "hominoid". This preset with one click provides you with all the structures to create a bipedal, human-like rig.
A timelapse of the rigging process in After Effects and Duik
Once the structures have loaded into the composition, the next step is to line them up with the character illustration. We always create a guide layer at the top to indicate where the centre points of each joint are. It's important to move the structures of each bit in order; on the spine, the hips are moved first and the spine tip is moved last, the same applies to both arms and legs.
Now that the "skeleton" is lined up correctly, the artwork layers can be parented to the structure layers.
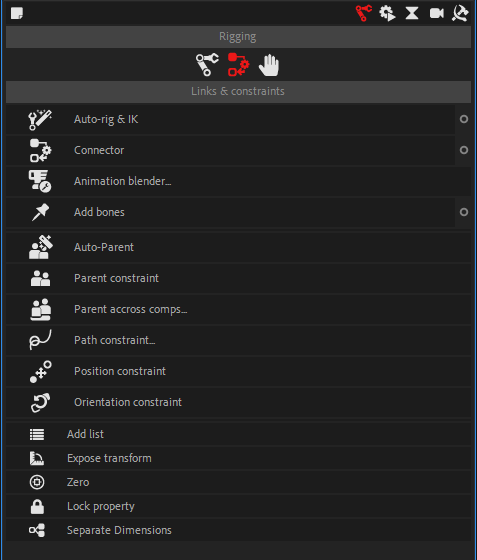
Select all the layers of the structure and then click the "auto-rig & IK" function. Now all the structures are rigged.
At this point, we now have a functional character rig. Before moving to the animation stage it is crucial to check every limb works properly. In this particular setup, we check both the arms and legs bend in the right direction. If they don't bend in the right direction - find the checkbox in the relevant layer to reverse the IK and switch the direction of the elbow. Now is a good time to perform a test move on all the controllers as any errors can be fixed now rather than it becoming a bigger problem later.

The final steps before animating are to make use of Duik's "zero" function. Once you have placed the character in its "neutral" pose, select all the controller layers and click "zero" in Duik's rigging panel. This will zero out all the position and rotation data for each controller, but will not move or turn the controller from its current point. If you need to return to this pose during the animation process, you need only type 0 into the properties of the layer.
It can be a bit disorienting with all the controller icons so close together and in the same colour. To fix this you can reposition, rescale and recolour every icon without affecting the rig. To do this you simply select the icon tab in each controller layer's effects controls.

Animation time
Now that we have the character rigged and ready to animate we get to the fun stuff, making Jake move...
Walking the walk
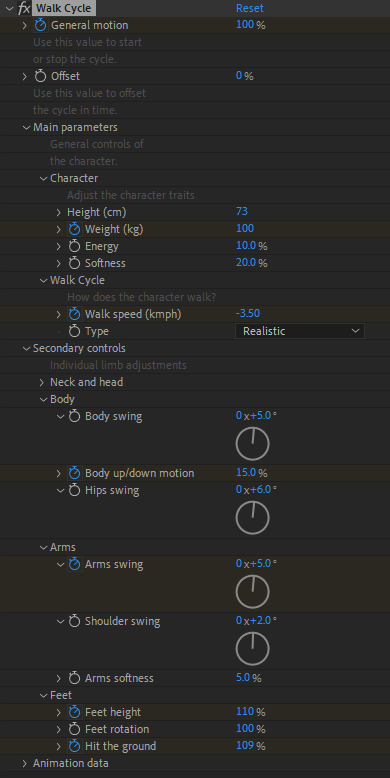
If all we need to do is make our character walk or run then Duik has made this really straightforward thanks to the walk cycle tool. First, we select the relevant controllers and open the settings for the walk cycle to check that all the correct controllers are linked properly and then press 'create'.


The main controls for dialling in the way our character walks can be found in the walk cycle controller in the effects panel, the main ones we'll use are "General Motion", "Weight", "Walk Speed", "Body up/down", "Arm Swing" and "Feet Height". Adjusting these settings can modify how our character walks or runs. With some fine-tuning, we can animate a simple but effective run cycle.
The finished walk cycle
Breaking the cycle
During a run cycle we may want the character's arms to hang out behind them. To do this we adjust the arm swing to a low number whilst also altering the "upper" IK angle. What would happen if our character needed to stop swinging his arms in order to grab a phone? During a run cycle this isn't possible with the hand controllers. The solution is to use the "Snap IK to FK" switch. Doing so will move the controller to the correct position and deactivates the FK.

Strike a pose
Blocking out key poses
More often than not an automatic walk cycle just won't cut it. Here we adopt a pose-to-pose approach to animation; blocking out the key poses for each stage of the character's animation. It's a good idea to get sign-off on these key poses before moving on to the next step.
The Inbetweeners
Now we begin to fine-tune the motion between our key poses. The inbetweening process is where we add or offset keyframes, adjust motion paths and dive deep into the graph editor. This is the stage where we can bring some real personality and "character" to the animation; where everything really comes to life.
Here's one we made earlier
We've really enjoyed pulling back the curtain on how we create characters and bring them to life. Hopefully you've learnt something new along the way too.
Finally to coin a phrase from the TV show "Blue Peter" (a long time client of ours):
"here's one we made earlier..."
This serves as a small taster of what is possible with character animation. For more great examples of this kind of work check out our case study on a series of character animations for BBC Bitesize
Now it's your turn
If you'd like to have a go at bringing our characters to life or have a go at creating your own character from scratch we've included all the assets for this project below, you'll just need a copy of Adobe Illustrator and After Effects with the latest version of Duik Bassel installed.
We'd love to see your results on social media, just remember to tag us @tracksandlayers in your posts!
Join Us!
We are always on the lookout for new talent to join our team so If you are a whizz at character illustration or bringing them to life through animation, we'd love to hear from you! If you are interested in joining our team send us a link to your portfolio/reel to info@tracksandlayers.com or if you are a freelancer looking to get on our radar for future projects fill out our freelancer form here
Work with us!
If you have a project coming up that needs characters brought to life and you've enjoyed this insight into our process please don't hesitate to get in touch with us or If you'd like to find out more about our comprehensive motion design service click here


コメント